Blog

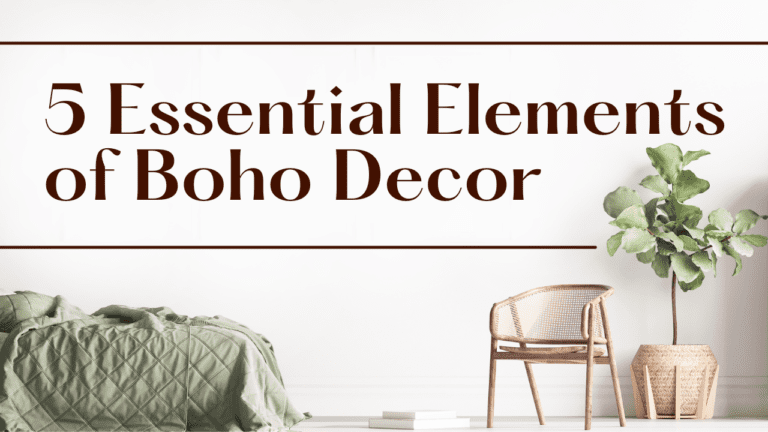
5 Essential Elements of Boho Decor: What Is Boho Decor?

Adding a bit of bohemian flair to your home can truly brighten it up and bring a unique warmth.

Boho style has been gaining in popularity lately as modern folks look for creative decorating ideas that allow them to express their personality without committing themselves too much to any one particular design aesthetic.

But what exactly does the boho decor experience feel like?

In this blog post, we’ll be taking a closer look at each of these essential elements so you can get started creating the perfect boho interior!

What Is Boho Decor?

Boho decor is a style of home decorating that combines elements from various cultures and different decades. 

It’s an eclectic mix of colors, textures, patterns, and styles that expresses a free-spirited vibe. 

It often features bright colors, patterned fabrics, mixed materials, and more to create an inviting atmosphere.

5 Essential Elements Of Boho Decor

1. Pattern Mixing

Pattern mixing involves combining different prints or textures together in the same space to create visual interest.

2. Natural Textures & Materials

Incorporate natural materials such as woven rugs, jute baskets, rattan chairs, or sisal wallpaper to add texture and contrast to the space.

3. Texture Layering

Texture layering helps to add depth by pairing items with similar tones but different textures like velvet against jute.

4. Neutral Palettes

A neutral palette of whites, grays, and browns helps to bring the look together. This will also help prevent the space from looking too busy or overwhelming.

5. Meaningful Accessories

Incorporate one-of-a-kind vintage pieces like trunks, leather chairs, or an old dresser for a rustic accent.

Meaningful accessories like books, art, and vintage pieces can also add a sense of personality to the space.

My Favorite Piece Of Boho Farmhouse Decor

If you’re looking to start your journey into boho farmhouse decor (or enhance your current boho look), here’s something that can really liven up your home.

One of my favorite Boho Home Farmhouse Decor pieces is Rool’s Chain Link Shelf Decor.

This piece of decor is the perfect addition to any boho home with its natural materials and simplicity.

A Boho Life

Boho decor doesn’t have to be complicated or expensive – it’s all about expressing yourself with what makes you happy. 

Go bold with pattern mixing, layer textures for interest, mix jewel tones with pastels, and add natural materials and meaningful accessories – the possibilities are endless! 

With some creativity and the right pieces, you can easily transform any space into one that reflects your individual style. 

I hope this post helps enhance your home!

how to clean vacuum cleaner

How To Clean Your Vacuum Cleaner | Best 4 Your Home

how to clean vacuum cleaner

Whether you are completely new to cleaning vacuums, or simply curious how to clean your vacuum cleaner to the highest standard, this article serves as a step-by-step guide in helping you do so. Before we explain how to clean your vacuum cleaner, we will start by breaking down some very basic information. This includes a clarification on the type of vacuum cleaners this guide will apply to, potential problems you need to be aware of, and all the materials that you need.

What Type of Vacuum Do you Want to Clean?

For starters, it’s important to note that there are many different types of vacuum cleaners. As a result, it can be difficult to learn how to clean vacuum cleaner products without first understanding which type of vacuum cleaner you have. Although there are many different types of vacuum cleaners that will still be able to be cleaned using this guide, note that this guide is going to apply to a standard upright vacuum. This is the one that stands up as one piece, comes with a hose to fit attachments, and operates with a rolling brush on the bottom.

How to Clean Vacuum Cleaner: Warnings and Potential Problems

Before we completely break down how to clean vacuum cleaner products, it’s important that we explore a few warnings and potential problems that you may encounter during the cleaning process. Learning how to clean vacuum cleaner products can turn into a dangerous circumstance if you aren’t careful to do things properly and run some basic security checks during the process. For your reference, here are a few of the most basic problems that can completely ruin the cleaning process, or even turn deadly.

Vacuuming Liquids or Cleaning with Liquids

Vacuuming liquids or using liquid products can be a rather dangerous thing to do when you clean your vacuum cleaner. Of course, it may be necessary if you have lots of dirt stuck inside one of the chambers to use water to clean your hose out. Although it is definitely a lot safer to use a broom or mop handle lined with lint-free towels, running water may be the only way to effectively remove every speck of dirt in a clogged and dirty hose.

Related: Vacuums Under $200

Cleaning the Vacuum Cleaner While Plugged in

If you wish to clean your vacuum cleaner, it can’t be stressed enough that you need to remove all power first. Electrical products can be dangerous to open up and clean with an active current still running through them. Although you may not necessarily die from the shock of a vacuum cleaner, it can still produce quite a bit of problems during the cleaning process. If you manage to use liquid products to clean your vacuum with an active electrical current, you can put both yourself and the machine’s life in danger.

Continually Checking the Cord for Insulation Damage

While you learn how to clean vacuum cleaner products, one thing that you should get in the habit of doing is checking the cord to ensure that the insulation is completely intact. Remember that the slightest presence of any bare wire can spell disaster. Accordingly, make sure to check the cord each time you want to clean your vacuum cleaner (or as much as possible) to ensure that you are using your vacuum safely. If you ever notice any bare wire, simply spend a few dollars on some electrical tape and keep it covered up.

How to Clean Vacuum Cleaner: Required Materialshow to clean a vacuum cleaner

Before you learn how to clean vacuum cleaner products, you will first need to check to make sure that you have all the right materials. Since cleaning a vacuum cleaner can be a tedious process, do yourself a favor and start by making sure that you have all the equipment you need first. The last thing you need is to have to make a last-minute trip to the store to pick up something that you are missing. With all the right materials, the time it takes to clean your vacuum will be minimal.

  • A dirty upright (or similar) vacuum cleaner
  • Broom or mop handle
  • White vinegar
  • Lint-free cloths
  • A sharp object like scissors or a knife
  • Water hose (optional)
  • Brush (optional)
  • Replacement filter (potentially)
  • Replacement brush belt (potentially)
  • Screwdriver (potentially)

Right off the bat, it may be relevant to explain what the main materials will be used for. This way, you can decide if you need them all or not. A broom or mop handle will be used (along with cloths) to clean the hose of the vacuum. Vinegar will be used to clean areas which are dirty and grimy. Lint-free cloths will be used for all steps involving wiping. You will need a sharp object to cut hairs and other tangled objects from the roller brush. Finally, a water hose is a great way to clean out the hose, but it comes with the need for extra time spent drying the hose before it can be used again.

Related Article: Best Vacuum for Wood Floor

How to Clean Vacuum Cleaner: 10 Steps

With basic background knowledge out of the way, let’s go ahead and break down how to clean vacuum cleaner products within an hour or so. Before you begin, make sure that you have at least a couple days free before you will use your vacuum again. Since you may decide to use water while cleaning your vacuum, it’s important that you reserve plenty of time to allow the vacuum to dry. Remember that most vacuums are not designed to suck up water and turning on a vacuum with water inside can break the vacuum and electrocute the person who did it.

1. Unplug the Vacuum and Clean the Trash Canister

For starters, the first thing that you need to do before starting the cleaning process is to make sure that the vacuum is ready to go. To do this, start by unplugging the vacuum. Quickly turn the power on and off to confirm that there is no active electrical current. Once you are confident that the electrical current is not running through the vacuum, remove the trash bag or canister. Using white vinegar and lint-free cloths, wipe down all of the dirt in the canister area. You will know when the vinegar is dry because you will no longer smell it.  

2. Wipe down and Clean the Filter

Once you have the trash canister area completely cleaned out, the next step is to spend some time with the filter. This is a crucial area since this is where all the air passes through as you are vacuuming. To clean it out, start by using a dry cloth to take out as much of the dirt as possible. Then use a separate clean cloth, damp it with a small amount of vinegar, and remove the rest of the dirt. If the filter appears to be uncleanable, replace the filter with a new one.

3. Remove the Hose from the Vacuum & Clean it Out

With the trash canister and filter out of the way, let’s switch our focus to the hose itself. Most upright vacuum models allow you to completely remove the hose from the vacuum. You may need to use a screwdriver or unlock a latch or two to get the hose out. It is recommended that you clean the vacuum hose by using a broom mop lined with cloths. Start by using a smidge of vinegar on the cloths to clean out the walls. Since vinegar kills bacteria and the odor goes away when it’s dry, it’s a great product to use on vacuums.   

Related Article: Lightweight Vacuum Cleaners

4. Run Water Through the Hose (Optional)

In some cases, there are circumstances where the hose in your vacuum needs a little extra cleaning. Specifically, if you notice that no matter how many times you use a cloth and broom to wipe down the walls of the hose there is still dirt present, using water might be your best option. Use your thumb to make the water run at the highest pressure possible. Then, watch where the water comes out and keep moving around until you notice that the water coming out is completely clear.

5. Lay the Vacuum Down and Remove the Brushhow to clean a vacuum

With a couple of the main components out of the way, it’s now time to focus on the mechanism which actually sucks up the dirt and garbage from the ground. Accordingly, this is a stage of the cleaning process which requires special attention and care. To get started, lay the vacuum down flat on the ground and expose the brush. If necessary, use a screwdriver to unlock the frame and take out the brush. However, keep in mind that some models may not allow you to do this. Be careful not to break the belt while removing the brush.

6. Remove All Hairs and Tangled Objects from the Brush & the Brush Slot

With the brush out, it’s time to carefully remove as much tangled garbage out of it as possible. Typically, the brush on a vacuum cleaner will be infested with tangled hairs and other similar long, sticky, and fuzzy objects. Remove all the gunk and fuzzy products that are sticking to the brush and can be simply pulled off. Then, use a knife or scissors to cut any of the hairs that are wrapped around and stuck on the brush.

7. Make sure the Brush Belt is Still Intact & Clean

The belt brush is a rubber circle which allows the motor to spin the brush around, and accordingly, pick up any trash that you may have on the ground. As a result, it’s important that you keep it clean and intact. You may even decide to change the brush belt if it is torn, stretched out extensively, or damaged. In most cases, a simple wipe down will do. Once clean, leave it to dry overnight.  

8. Completely Sanitize the Brush and Brush Slot

Once you remove the belt and have the brush out and ready to be cleaned, spend time thoroughly cleaning the brush and removing all possible pieces of dirt. This will help the brush to function much more efficiently. Finally, once you have the brush cleaned, spend some time wiping down the chamber where the brush and brush belt normally sit. Typically, the slot where these things sit can be very dirty and full of grime. Use some white vinegar to completely sanitize it.

9. Completely Wipe Down the Vacuum Exterior

Once you reach this step, you are nearly finished with cleaning your vacuum. However, it’s important that you also clean and maintain the parts which are on the outside. The exterior of the vacuum is the place where you are constantly touching when handling it, and accordingly, can have plenty of germs and bacteria present. For a final touch to the cleaning process, make sure to thoroughly wipe down the exterior using white vinegar.

10. Wait for All Parts to Be Completely Dry Before Using the Vacuum

Finally, it’s important after a good vacuum cleaning session to let all of the parts sit for an extended period of time so that they can dry. If you used vinegar, it is simple to test how dry the parts are. Simply smell the parts. If you can sense the scent of vinegar, then it needs to sit for a longer period of time. If you use water, let it sit for a day or so in a well-ventilated area before even thinking about connecting all the parts together and using the vacuum again.

How to Clean Vacuum Cleaner: Tips & Trickshow to clean your vacuum cleaner

For many people, learning how to clean vacuum cleaner products is a daunting task. However, as we have demonstrated, this is a task that just about anybody can do. Now that we have covered the basic steps behind cleaning your vacuum cleaner, let’s now break down some extra tips and tricks to help streamline this process and make it easier the next time you need to do it.

Consider a Professional Cleaning

Odds are high that if you are just now learning how to clean a vacuum cleaner that you aren’t quite that good at it. If you are the type of person who considers their time to be more valuable than their money, then you might instead simply hire a professional cleaner to clean your vacuum. In most areas, finding somebody who can do a professional cleaning is actually very easy and reasonably affordable.

Avoid Using Water Whenever and Wherever Possible

In case you didn’t already know, water and electricity don’t blend well together. Especially if you want your vacuum to continue working while simultaneously avoiding an electrocution accident. If you want to clean your vacuum in the safest manner, avoid using water whenever you can. Since vinegar dries out and no longer has a noticeable scent, it is much easier to use. Best of all, vinegar also kills most of the bacteria and germs present.

Clean Every Other Week or So

The frequency in which you choose to clean your vacuum will have a direct effect on the suction and overall capability of your vacuum’s cleaning features. If you want your vacuum to be both in tip-top shape and capable of staying this way for the longest period of time possible, simply make sure to clean it as much as possible. You don’t necessarily need to clean every single time you vacuum. Every other week or so should be more than enough.

Let the Vacuum Sit Overnight with Wet Parts Out in the Open

As we briefly noted, it is important not to put everything together right away. Once you are finished with cleaning your vacuum, it’s crucial that you leave the vacuum opened up so that all the parts can dry off and free themselves of the slightest hint of any moisture. The presence of a drop or so of liquid may not necessarily break the vacuum, but it can add over time and damage the overall quality more than you think.

Change Bags with Each Cleaning Session, Change Filters Every 6 Months

If you have a bagless vacuum, you are lucky. You simply need to clean the canister each time you clean the vacuum. You won’t need to worry much about changing the bag, since after all, your vacuum is bagless. However, if you use a bagged vacuum make sure that you change the bag each time you clean the vacuum. Change the filter for the vacuum every 6 months or so. Also, be sure to keep a close eye on the brush belt. It needs to be changed every 6 months or so as well.

How to Clean Vacuum Cleaner: Summary & Reminders

The purpose of this article was to inform you on how to clean vacuum cleaner products without worrying about them breaking or becoming defective. In reality, vacuum cleaners are a rather simple product to both use and clean. With the right level of maintenance, a vacuum cleaner should last for quite a long time. However, make sure to also heed the warnings and follow the instructions described above carefully so that you don’t run into unforeseen problems or circumstances.

how to use vacuum cleaner

How To Use A Vacuum Cleaner | Best For Your Home

how to use vacuum cleaner

Do you really know how to use a vacuum cleaner? Sure, turning it on and moving it back and forth is simple enough, but there’s more to it than that. One would think that using a vacuum cleaner needs little explanation, but is that true? You may have used a vacuum cleaner most of your life, but are you using it correctly? How do you know if you’re following the best practices? Read on to discover instructions on how to use vacuum cleaner like a pro.

Before we discuss the best practices on how to use a vacuum cleaner, let’s first learn a little science lesson regarding suction.

How to Use a Vacuum Cleaner: It all starts with the science of suction 

The simplest example of suction occurs when using a straw in your favorite beverage. Sucking the straw causes more pressure at the bottom of the straw than at the top. The soda moves to the area with less pressure, which is at the top of your straw by your mouth. This is how we drink with a straw.

The vacuum works similarly.

When you plug in your vacuum and turn it on, the electric current operates the motor. The motor is attached to a fan. As the fan’s blades turn, they force the air created upwards toward the exhaust port of your fan. When the air is driven upward, the pressure increases in front of the fan and decreases behind the fan. This is where the straw analogy comes into play.

The pressure level in the area behind the fan drops below the pressure level outside the vacuum cleaner. This creates suction. The outside air pushes itself into the vacuum cleaner through the intake port because the air pressure inside the vacuum is lower than the pressure outside the vacuum.

Related Article: Lightweight Vacuum Cleaners

This may explain how air moves through a vacuum, but it does not explain how dirt and debris are collected inside it. Here’s how dirt is collected. As the outside air moves inside the vacuum, the moving air particles rub against dirt and debris. If the dirt is light enough and the suction is strong enough, the dirt is carried inside the vacuum with the air moving from a high-pressure situation to a low-pressure one.

As the combination of air and dirt move through the vacuum, it passes into a vacuum cleaner bag or a filter. The tiny holes in the bag or filter allow the air to pass by but keep the dirt particles inside. The dirt and debris collect in the bag or on the other side of a filter in a container. This collection container is usually the last space the air travels through before leaving the vacuum at the exhaust port.

This process is usually helped along with a rotating brush. A brush often knocks the dust and dirt loose from the surface. That way, the air stream can pick it up.

For the most part, this describes the basis for the design of most vacuum cleaners. The design has changed and improved throughout the years.

In the 1980s, James Dyson changed the basic design of the vacuum to create a cyclone system. This system does not use a filter or a bag. Filters and bags often cause the suction of a vacuum to decrease over time. Dyson’s plan sends the air stream through one or more cylinders in a spiral pathway. As the air moves forcefully in a circular path, the dirt and debris experience centrifugal force. In this model, the dirt is whipped outward, away from the air stream, and falls to the bottom of the cylinder.

If this is the basic design of the vacuum, why are there so many different brands and models of the same brand? The answer is complicated, but it involves price, design, and usage.

Now that you have a basic understanding of the physics behind using a vacuum, let’s learn the best practices on how to use a vacuum.

Step by Step: How to use a vacuum

how to use vacuum cleaners 

First, pick up everything on your floor. Remove the shoes, toys, phone chargers, and decorations. Once a month, consider moving small or light furniture. A couple of times a year, remove the large furniture.

Have you ever watched new carpet being installed in your home? Are you embarrassed by the amount of dirt that is discovered when the old carpet is removed? To keep your home as dirt-free as possible, it is important to first use the crevice tool around the outside edge of your room. The soil that makes its way under the carpet does so by working its way there from the edges of the room.

Use this crevice tool to vacuum under raised furniture in your room. Dirt and hairballs accumulate underneath the furniture. You don’t want a tumbleweed of hair to make its way out from underneath your couch when your mother in law is visiting.

Once you have finished with the hose and attachments, select the correct vacuum setting for the surface you are cleaning. Most vacuums allow you to choose from between a hard floor surface all the way up to shag or thick-ply carpet.

Once you have used the crevice tool, vacuum your room horizontally. Go slowly enough to allow the brushes to do their work and dislodge the dirt and debris from your carpet’s fibers. Make sure you overlap the strokes as you move throughout the room.

Related: Best Canister Vacuums

While you are going across the carpet horizontally, look for stains on your carpeting. Stop each time you see a stain and treat it with either an over the counter product or an at-home remedy.

Once you have worked your way across the room horizontally, start at the farthest corner away from the door and work your way backward vertically. Not stepping on the carpet that has already been vacuumed will keep the fresh vacuum tracks intact.

While vacuuming in two different directions may feel like overkill, this is an especially necessary tactic for those with pets. The dirt and hair from your pet can become stuck to the fibers of your carpet. Moving the carpet across two different directions will help dislodge that dirt from the carpet fibers.

Those of you with pets may also add a step to this process. Purchase a large container of baking soda or powdered room deodorizer. Sprinkle this liberally on your carpet and vacuum it up to remove the odors associated with pets. No one wants a visitor to walk into your house to smell and dog or a cat first thing.

Now that we understand how a vacuum works and the best practices on how to use a vacuum cleaner, let’s discuss ways to use your vacuum in your house for other uses than cleaning your floors.

Creative uses for your vacuum how to use a vacuum

Now that you’re a pro on how to use a vacuum, here are some inventive ways you can put your vacuum to good use.

  • Clean your screens

Those who suffer from seasonal allergies know how crucial it is to keep “the outdoors” outside of your house. Because of this, it is a good idea to vacuum the screens of your windows weekly during allergy season. Clean your window screen and door track before those nasty allergens move into your home.

  • Clean your vents

Keep the air clean in your house by making sure that your vents are free of dust and debris. Uncover your vents and stick the hose end of your vacuum as far down the area as possible. You may consider not using an attachment at the end of your hose when completing this process since retrieving the attachment will be down-right impossible if it becomes loose.

  • Clean your appliances and electronics

Appliances are expensive. Keep your refrigerator running longer by vacuuming off the coils on the back of the unit. Vacuum out the lint trap on your clothes dryer to keep it free of debris. Use the soft brush at the end of your vacuum’s hose to rid your keyboard of crumbs and dust. Remove crumbs from your toaster as well.

  • Deodorize your house

Air fresheners may be harmful to our health. Instead of purchasing these products, consider using essential oils, baking soda, and your vacuum to keep your house free of offensive smells. Did your smelly dog stink up your favorite chair? Sprinkle baking soda on the cushions, and then use the upholstery brush to suck it back up through your vacuum. The doggy smells will be gone, and your dog will no longer be banished to the dog house. Speaking of dogs, did you know that you could remove fleas from your home by vacuuming?

  • Essential oil trick

Add a few drops of your favorite essential oil to your vacuum cleaner’s bag or filter. Enjoy the nice, natural aroma as you move through your house.

  • Clean your pet

If your vacuum does not terrorize your dog or cat, attach the brush and turn it on using the lowest setting. Gently rub the soft head across the back of your pet. Your dog or cat may enjoy this massage, and the loose hair will end up in the vacuum bag instead of on your floor or furniture.

  • Help with a fussy baby

Those with colicky infants know how frustrating late afternoons can be. Consider trying this trick. Swaddle your infant in a front carrier that holds your baby close to your chest. Vacuum your house while bouncing along with the infant. The sound of the vacuum, your bouncing movement, and the heat of your body may help your infant fall into a peaceful sleep.

Related: Best Commercial Vacuum Cleaner

How often do you need to vacuum?

Some say you need to vacuum once a week for every member living in your household. This includes pets. So, if your family includes mom, dad, brother, sister, and Rover, you need to vacuum five times a week.

What to do if you hate vacuuming

Some people hate doing laundry. Some people hate cleaning out the shower. Others hate vacuuming. What do you do if you hate vacuuming? It’s a necessary part of keeping a house tidy and clean. Here are some tips to help you get through the process.

  • Schedule a time to vacuum

Set aside a specific time during the week to vacuum. Schedule it. Write it on your calendar. Add a reminder to your phone.

  • Keep your mind off of it

Turn on the TV with closed captions. Read the dialog as you work your way through the room. Wear headphones and listen to an audiobook, podcast, or music. If you enjoy exercising, use the time vacuuming to do lunges across the room. Work your rear end and clean your house at the same time.

  • Hire someone to do it

While most do not have the economic resources necessary to hire a house cleaner, this is always one way to avoid tasks you hate. On a budget? Consider hiring the teenager next door to complete this task for you weekly. If you have kids, use the Tom Sawyer routine to encourage your child that vacuuming is a super fun task. Have your kids compete for the opportunity to use the vacuum. When your kids wise up to your shenanigans, pay them to do it for you.

If you hate vacuuming, a robot vacuum may change your life. Robot vacuums have come down in price through the last several years making it affordable for most households.

If you are interested in purchasing one of these vacuums, make sure you consider what type of surfaces the machine will be forced to maneuver over. If your robot will need to make a transition between carpet and a flat surface, make sure you purchase one that can make that transition with ease.

When using the robot vacuum, one needs to remember to move electric and drapery cords. You also need to block furniture with low clearance because it may get stuck in those tight spots. No need to worry about steps. The robot vacuum has a monitoring system that keeps it from falling down a flight of stairs. Other than those concerns, the robot vacuum moves throughout the room, sucking up dirt and debris. This device is a must-have for those who hate to vacuum.

Regardless of how you feel regarding vacuuming, it is a necessary part of keeping a sanitary home. Vacuuming not only makes your home look and smell nicer, but it also helps remove allergens from the house that may affect you or your visitors.

how does a vacuum cleaner work

How Does A Vacuum Cleaner Work?

how does a vacuum cleaner work

There are many devices that we use that make our lives easier—and vacuum cleaners are one of them. You may wonder how does a vacuum cleaner work? The purpose of this article is to answer that question so you know how a vacuum cleaner works. Also, there are many types of vacuum cleaners that work in different ways, we’ll get into that as well. But first…

Definition of a Vacuum Cleaner

Before answering the question of “how does a vacuum cleaner work?” it is useful to know about the basic concept of a vacuum cleaner first. The definition of a vacuum cleaner according to Merriam-Webster is, “A household appliance for cleaning floors, carpets, upholstery, etc. by suction”. A vacuum cleaner can be used on many different surfaces so that your living space is clean. Vacuum cleaners make it possible for you to clean up dust or any other small debris that you may not be able to see on many surfaces. Being able to suck up debris with a vacuum is something you may take for granted that can make your living space cleaner and improve the indoor air quality.

How Does a Vacuum Cleaner Work: The Components of a Vacuum

There are components in a vacuum just like any other devices that we use every day and knowing these components is important to understanding the question “how does a vacuum cleaner work?”. There are six basic components in a vacuum cleaner that work together and allow a vacuum to suck up debris from different surfaces.how do vacuum cleaners work

  • Intake Port
  • Exhaust Port
  • Electric Motor
  • A Fan
  • A Porous Bag
  • A Housing Container

According to Harris (n.d.), the intake port of a vacuum cleaner is the part where air and debris goes into the vacuum. This is also where cleaning accessories attach. This is a very important component because there would be no place for debris to go into a vacuum cleaner without it. The exhaust port is what allows the extra air to escape the vacuum cleaner so that pressure doesn’t build up. This is so that extra air that is sucked into a vacuum has somewhere to go, which is why the intake port is an important component.

The electric motor uses magnets to create attracting and repelling forces that cause motion or rotational motion. An electric motor is what allows the fans to move, so that the fan blades inside it can rotate and create suction for a vacuum. The fan blades turn in a circular motion and create the suction force that lets air go into a vacuum. Without the force produced by the fan, a vacuum would be unable pick up debris and would not be able to clean any surfaces.

A porous bag is where all the debris goes after it is sucked up by the vacuum. That way, it does not go back on the surface you are cleaning or go into the air. Finally, the housing container is the component “that contains all the other components” vacuum cleaners need (Harris, n.d.). The housing container is what holds all the components of a vacuum together and the components would have nowhere to go without it.

It is important to understand what happens when a vacuum cleaner is turned on, which will also help answer “how does a vacuum cleaner work?”. Electronic current that is created when you turn on a vacuum allows the motor to start working and the fan to start moving (Harris, n.d.). This is the first aspect of turning on a vacuum and it is important because the motor allows the fan to start working. A vacuum needs a source of power to get its motor working whether it’s with a battery or with an outlet. A vacuum cannot function without the motor and the fan would not work without the motor, so having a power source is vital.

Related Article: Lightweight Vacuum Cleaners

The fan is the next major function that occurs once the vacuum is turned on and the motor is working, which is what creates the suction force. The motor allows the fan blades to start turning so that they can create a force of air going into the exhaust port of a vacuum (Harris, n.d.). This process is what creates the suction force that picks up debris off of surfaces and pushes it through the exhaust port. A vacuum would be useless if it did not have this force, so it is vital for the fan blades to turn. This step is simple, but it is what makes vacuum cleaners capable of cleaning surfaces in your living space.

The next major step that occurs once you turn on a vacuum is the suction force and the air particles create density or air pressure. Air particles are pushed forward and air pressure “increases in front of the fan and decreases behind the fan” (Harris, n.d.). This is what makes the force of a vacuum cleaner powerful enough to pick up dirt on surfaces that you are trying to clean. The air and debris would not go into a vacuum and would not stay in it without this air pressure that is created. This may seem like another simple process, but it is important to a vacuum cleaner functioning properly.

There are a few more important details about the air pressure created by a vacuum that can help in answering the question “how does a vacuum cleaner work?”. The air pressure behind a fan is lower than the air pressure outside of the vacuum, which is called ambient air pressure and it is what creates the suction force (Harris, n.d.). It is important for a vacuum to create lower air pressure inside the vacuum so that the suction force can be created. The ambient air pressure goes into the intake port of a vacuum cleaner because of the lower pressure inside (Harris, n.d.). This is where the intake port contributes to the process of a vacuum working because it gives the air pressure a place to go.

A vacuum cleaner would be unable to work if the flow of air is cut off or interrupted in any way. The fan needs to keep moving and the path into the vacuum needs to stay clear, so that “there is a constant stream of air moving through the intake port and out the exhaust port” (Harris, n.d.). This means that if a fan is not working properly, you may need to replace the fan or get a new vacuum because there will be no suction force. Also, you have to make sure that the passageway into the vacuum remains clear, so you may need to clean it out. This is so that the air and whatever is sucked up from surfaces has a way to go into the vacuum.

Types of Vacuums and How They Work

There are many types of vacuums you can use that all have the same basic functionality and components, but each has a few differences.

  • Bag Vacuums
  • Bagless Vacuums
  • Wet dry Vacuum
  • Cyclonic Vacuum
  • Automatic Vacuums

Bag Vacuum Cleanershow vacuums work

Vacuum cleaners with a bag are the first major type of vacuum and it is more basic in its function than the other types. According to Woodford (2017), vacuums with a bag work by using electricity from an outlet. The three basic components are a brush and suction head, a motor, and a bag. This seems simple enough and is similar to the basic concept of a vacuum cleaner that was discussed earlier. These types of vacuums usually need to remain plugged in to an electric outlet to function properly. Vacuums with a bag seem simple enough, but there is a little more to understand besides its three basic components.

There is a process that occurs when these types of vacuums are turned on that allows them to function. The electricity from the outlet allows the motor to work, which moves the rubber belt that “turns brushes and beaters on the roller” (Woodford, 2017). The fan sucks in the air and dirt, the air goes in the machine, the dirt goes into the bag, and the air exits out of the back (Woodford, 2017). This is a very basic process that allows vacuums with a bag to function so that they can pick up debris and put it into the bag. With these types of vacuums, the bags need to be cleaned out or replaced otherwise the dirt will have nowhere to go.

Related: Best Canister Vacuums

Bagless vacuum cleaners

There are also bagless vacuum cleaners that you can use, and they work a little bit differently than ones with a bag. These types of vacuums use a plastic bin instead of a bag where the dirt is separated from the air with a filter and it goes into the bin (Woodford, 2017). The bin that collects the debris needs to be emptied when it is full instead of needing to replace a bag, but the filter may need to be replaced. There is a hose that connects through the front of a bagless vacuum, which makes the airflow linear so that debris can go straight to the filter (Woodford, 2017). There are less areas on these types of vacuums that can have a blockage, which means the hose is the most important part that needs to remain clear.

Wet and dry vacuums

Wet and dry vacuums are another type of vacuum that you can use, and it works differently than other vacuums. These kinds of vacuums use, “a two-bucket system that separates the liquids from the solids into two different chambers” (Charles, 2018). This allows wet and dry vacuums to not only pick up dirt but to also pick up liquids such as water or juice. Liquids and dirt go through the tube where the airflow weakens over the buckets so that the debris and liquid fall out of the air stream (Charles, 2018). That is a simple process that allows this type of vacuum to pick up dirt and liquid that can make your living space dirty.

Cyclonic vacuums

how a vacuum cleaner works

Cyclonic vacuums have a few different components including a brush bar by the air intake, a powerful electric motor, and a cyclone pointing down. These different parts make it possible for this type of vacuum to work, which is supposed to make the air exiting it cleaner. The process begins with air going into the brush bar and going up the cyclone with dirt falling to the bottom. The next step involves air going to a top section with multiple cyclones to remove smaller debris particles and then the air going through two filters on its way out (Woodford, 2017). The process for this type of vacuum is a little more complicated but it is supposed to prevent smaller particles from going back into the air.

Related: Best Commercial Vacuum Cleaner

Automatic vacuums

Automatic vacuums are a fairly newer type of vacuum that are meant to vacuum your living space automatically. These vacuums use a filter and bin but there are a few different components such as an infrared sensor, wheels, counter rotating brushes, and a battery that can be charged (Woodford, 2018). It works very similar to other vacuums with the debris going into it, through a filter, and into the dust bin. These vacuums use infrared sensors to sense objects that might be in its way and there are some that even map out your living space so that it can clean more efficiently (Woodford, 2018). These vacuums usually have a round shape and wheels that allow the machines to move around the floor of your living space.

Final thoughts on how does a vacuum work

Vacuum cleaners are an important cleaning tool that many people use. How a vacuum cleaner works is a fairly simple process once it is broken down. The process involves a suction force that takes in debris and puts them into a bag or bin. There are many different types of vacuums that all work similarly but with a few differences. Hopefully this article has taught you a bit more about a common household object you may have taken for granted before.

how to shock a pool

How to Shock A Pool | A Step By Step Rundown & Troubleshooting Tips

how to shock a poolWhen you decide you want a pool in your backyard, and you have one installed, you also need to know how to shock a pool. That way, it is always safe to swim in. If you winterized your pool and warm weather is moving in, plan to clean and shock your pool about a week before you take your first swim.

So, what does it mean to shock your pool? It means you clean the pool by adding an excess of chlorine to the pool water, so it will kill off any contaminants and bacteria that could make you ill.

In the process, you are sanitizing the pool and making it safe for everyone to swim in. Test the pool water daily, especially if the neighborhood kids come over to swim in your pool all the time. When the ingredient levels begin to slightly change, you need to add the shock treatment.

How to Shock a Pool, Begin With A Pool Water Tester

Purchase a water tester so you have one handy to test your pool water often. This is important so that algae and other unwanted ingredients do not begin growing unnoticed in your pool in its early stage.

Your water, as a visual indicator of negative change, becomes cloudy and turns green. That is when you know you need to shock the pool. But, do not wait that long until your water turns, as unpleasant things are already growing in the pool.

What Levels to Test For

The three main water ingredients you will constantly check levels for are: free chlorine, alkalinity, and the pH level, which is a measure of hydrogen ion. This is especially important whenever the water becomes warmer during the hot summer days, or if it is warm spa water. Warm water must be shocked more often. Test the water first before conducting the first shock treatment.

pH Level

pH level stands for how acidic the water is, and the range is from 0 to 14, with 7 as a neutral level. Less than 7 shows the water as acidic, while a level greater than 7 shows it is more alkaline. Clear bottled drinking water averages around a pH range of 6.5 to 8.5, in case you wanted to know. For your pool water, the pH level should range between 7.2 and 7.6.

Alkaline Level

Your water’s alkaline level should range between 80 and 120 parts per million (ppm). If your pool water is almost totally alkaline, add muriatic acid at once, based on your pool water volume. Let the water sit until the alkaline level has reached the proper level given above before you begin the shock treatment. See more information about this next.

Free Chlorine (FC) Level

The short version of what you should know in measuring chlorine is that free chlorine (FC) is the amount of available chlorine still available in the pool to sanitize the water properly.

There is also combined chlorine (CC) which is compromised chlorine because it has interacted with bacteria, sweat, suntan lotion residue, sunlight, and other foreign compounds to create chloramines. Free chlorine, when it bonds with the nitrogen or ammonia output of foreign compounds, turns into CC. CC is now unable to disinfect anything. When you shock pool water, all CC is eliminated because the added chlorine takes it over and “burns” it up.

Combining FC and CC leads to the total chlorine (TC) level count, which should be equal or greater than that important FC level reading.

If you ever smell “too much” chlorine (which is the CC that smells), this means you must add more chlorine because there is not enough available in the water to properly disinfect it. FC is working extra hard to try and clean things up.

Related: Best Solar Pool Heater

Another thing to know is that when the pH balance is too high (alkaline), this also threatens the available FC’s ability to clean the pool water effectively. Start the stabilization with muriatic acid to get the water back to proper pH levels.

Find out more at this link about chlorine and how it relates to cyanuric acid (CYA) and the pH level.

how much chlorine to shock poolPreparing Your Pool for a Shock Treatment

The first time that you want to shock your pool after winter is over, remove all pool covers and remove any debris in the pool, such as leaves. If there is a low level of water in the pool, then add water to the pool, up to the normal swimming level.

Do not use the pool cover again as you need the water to be the same temperature as it is outside. If the pool is inside the water should be room temperature.

Never run your heating pump at the same that you shock a pool. Avoid shocking warmed water, such as what you get when the sun shines directly on it throughout the day. Take the temperature of the water, starting a few days before the shock, to see what the average pool water temperature is in the evening hours.

1. Calculate Your Pool Size for Water Volume

By now, you should also know the volume of water that fits in your pool, as you will add the right amount of shock based on that measurement. Here is one way to get the numbers calculated. Once you have the numbers, you will know how much chlorine to shock pool with.

Measure the length of your pool by its width. If it is a surface pool, then you can measure from the ground to the top level of water inside the pool as its depth. Measure from the bottom to the top of the pool rim, then stick the measuring tape down inside to the water level. Subtract those numbers from the total of the bottom to top of the pool.

Now you can plug those numbers into the formula calculation as Length times Width times Depth times 7.5 (gallons in each foot) = Volume (or L x W x D x 7.5 = V).

If you want to know more about getting your correct pool’s water volume, go here to this handy online pool water calculator. You can even calculate uneven depths in a customized pool, as well as for round pools.

2. Test for pH and Free Chlorine Content Levels

Test your pool water for readings of your pH, alkaline, and free chlorine levels. You must look for whether your water is too alkaline, in which case you add muriatic acid first before doing the shock treatment.

If you do have to add muriatic acid, add the amount shown on the package that stands for your pool water volume (gallons). For example, add a quart of muriatic acid for 15,000 gallons.

Get a portable bucket of water and gently pour the acid into the water to dissolve it. Use protective gear when doing so. Start the pool pump, add the acid into the pool, and run the pump for an hour. Test the water for current readings. Keep running the pump until the pH balance is restored. You can find out more about muriatic acid here.

You are ready to apply the shock treatment when pH is back to a reasonable balance (between 7.2 and 7.6). If all you need to do is add muriatic acid and you want to go swimming, make sure the pump is running and wait three to four hours after dispensing the acid before getting into the pool. Test the pool water first to make sure the pH balance is correct. Only get in the water if it is crystal clear.

Related: Best Pool Pump

Help—Pool Cloudy After Shock!

Cloudy pool water after shocking can happen for several reasons. If the pool water is cloudy after both the muriatic treatment and shock treatment, then test the water again for reference. You may need to add muriatic acid again and do another shock after that. However, do the following step first.

Check your pool pump and filter to make sure it is clear of debris and in good shape before you do another round with muriatic acid and the shock treatment. Your problem could also be a malfunction in your pump system, especially if it is an older system.

3. Chlorine or Non-Chlorine Shock

Many pool owners use a chlorine shock, but if you are sensitive or allergic to chlorine, choose a non-chlorine shock product for this next section. You buy the amount of chlorine shock treatment, usually one bag (or one pound) per 10,000 gallons of water (volume) in a pool. Note that if you have significant algae in the pool water, you may need to add twice or three times the amount of chlorine to get rid of it. You select how much chlorine to add to shock pool, based on your water test readings.

You can read the instructions on the product to know how much you should buy, based on your pool’s water volume. Buy extra, just in case you have a more severe problem. Store unused shock in a cool, dark protected area, preferably in a closed plastic tub to keep it dry.

Non-chlorinated shock treatment options, aside from chlorine sensitivities, can be a better choice if you have hard water problems, or use vinyl pool liners. Also, they do not leave any ‘pool cloudy after shock’ effect.

One of the highlights of non-chlorinated shock treatments is that you can get into the water sooner than if you use a chlorine shock treatment, for which you may need to wait 48 hours. Using a non-chlorine shock treatment means you can get in almost right after treatment.

You should always check the labels to be sure about the right time to get in for each of these products. Never forget to take your readings to make doubly sure that it is safe.

Check this link, non-chlorine products, which may be helpful to you, if you are sensitive to chlorine.

4. Apply the Shock Treatment

When you get ready to pour the shock, add water in a plastic hand-carry bucket first, and then gently pour the shock into it to pre-dissolve it. It is better to have the shock in a liquified state, so it disperses easily. This is particularly important if you have a plastic liner in your pool. If in granular form, it may settle to the bottom, and chew up the plastic.

You may need to wear protective gear, such as a face mask to protect your eyes, nose, and mouth from getting any fumes into sensitive membranes, while you pour the shock into the water. Also, wear plastic dishwashing gloves or workers gloves to protect your hands while mixing, and for carrying the bucket while dispensing the shock.

Walk around the pool edge as you pour the shock into the pool. Next, turn on your pool pump (not your heating pump) and let it run for at least seven hours, and up to 24 hours if necessary.

Some posts have said that running the pump will cost you in electricity expenses. However, running the pump, despite its costs, does a better job of dispensing the shock throughout the volume of water. It is either that or spend money hiring a professional to handle the job. Generally, you should run the pump daily anyway, for up to seven or eight hours.

Never shock a pool while it is raining or threatening to rain. The accumulation of more water, plus debris, can change the water volume and you may need to reduce the water to proper swimming levels before testing the water. Clean the pool too and test the water.

Related: Best Above Ground Pool

When Is It Time to Apply a Shock Application?

pool cloudy after shock

Unused Pools

The answer to this question is deciding first how dirty your pool is. If the pool has been sitting unused for over two years and you are not experienced with shocking a pool in this state, call in a professional and have them take care of it. It will be worth the aggravation for them to do it, instead of you.

At the same time, you can watch and learn a lot from the service professional about what it takes for a good cleanup. You may also be moving a few frogs and other wildlife that have settled in their happy haven. A pool in this state, may need to go through several treatments that can take a few weeks, depending on the situation.

Note: If your pool is left standing unused for a long time, consider adding a perimeter fence and an entrance gate, with a lock, around the pool. This gives a safety element that will keep children and pets (including neighbors’ children) from going into the pool area. Install caution signs on the gate.

It also helps for the same reason, that when you are shocking a pool, or adding other chemicals, that children and pets do not play around the pool while chemicals are at work. You never know when one of them could fall in, especially if they are alone.

If the pool water is cloudy and murky, for example, you would never know until too late that anything had happened if a child or pet did fall in. Practice pool safety to those who use the pool regularly. Always keep a secured pool cover on top when the pool will not be in use. You can never be too paranoid about your loved ones’ safety.

New Swimming Season

If you have simply over-wintered your pool from the earlier swimming season, then it may take only one shock treatment. Test the water first to get those measurement readings for the status of the water’s pH and FC levels.

Check the readings to see if you need to apply muriatic acid (or hydrochloric acid) first because of a high alkaline reading. This would be if the pH reading is above 7.8. If it is above that number, then you must add the acid first before doing the shock. It is useless to do the shock until then.

How Long to Wait After the Shock Application?

Once you apply the shock treatment to the pool water and are running the pump, wait seven to eight hours, then test the pool water. Remember to apply the shock in the early evening hours when there is still light to see by, but not while direct sunlight shines on the water.

You want to avoid any sort of heating while the pool water is stabilizing. Remember never to run any heat pumps either. Only run the pool pump.

While you can wait eight hours before going in the pool, waiting 24 to 48 hours would be better. Run the pump the whole time to ensure that all the water has had time to run completely through the filtration system. This process also helps sanitize the filtration and pump system too. Always test that water before going in. The chlorine level should be less than 5 ppm.

If you use a non-chlorinated shock treatment, it is possible to get in the pool right after the treatment. Check your product’s instructions to know exactly when to get into the pool. Always do your water tests first.

It is preferable, however, to at least let the water completely run through the pump once, just to be sure. If you live to swim in your pool as often as you can, you may feel like your water testing kit is your new best friend because you must interact with it often.

Related: Best Inflatable Pool

Using Other Applications to Support Your Pool

There are other chemicals you can add, such as calcium chloride, after which you should wait two to four hours before getting into the pool. The level should read 5 ppm (pounds per million), or, to be safe, wait 24 hours which is a full filter system cycle. Always follow the directions on your chemical package and instructions.

Troubleshooting Tips and Things to Know

How Often Should You Shock Your Pool?

The typical time span for shocking your pool during average use would be once a week. If you have children from the neighborhood coming over every day to swim in your pool with your own children, you may need to do it more often during the week.

Do a daily test with your kit to make sure you know what the readings are every day. If you use your heat pump during cooler weather, you should test your water too, as heat from the sun and heating pumps will change the water and make it more susceptible to algae growth.

If you have storms passing through your area, get a pool cover to protect your water. Leaves and other debris from the surrounding environment will get blown into your pool, and the chlorine will begin working harder to get rid of it, which means the chlorine depletes faster into CM mode.

Add the cover, preferably before the storms get too heavy, then when the storm is over with, test the water to make sure it is safe.

If I Cannot Do It Myself, How Do I Choose a Service Professional?

By now, you realize that there is a lot more to owning and supporting a pool and its water in a safe manner so that everyone can enjoy it. That is why there is a whole industry with service professionals who are there to take over when things get too complicated for you to handle.

Always choose a service provider that comes with good credentials and has high online ratings from its customers. The power of a good review goes a long way for everyone concerned.

What Kind of Pool Water Testing Kit Should I Buy?

Choose a kit that offers you many testing results such as pH, alkalinity, free chlorine, combined/total chlorine, calcium hardness, cyanuric acid, and more. Make sure you understand what each of the components stand for, aside from pH, alkalinity, FC, CC, and TC.

Some kits come with a photometer giving a digital reading, but you may need to use tablets to test for cyanuric acid. Check to see how long any tablets and chemicals associated with the testing kit will last. Some testing ingredients (powders, tablets) may last over a year, while others are under a year. Ideally, the kit comes in a protective case, such as a polyethylene case, for easy storage in a safe cool place.

Select a kit that gives complete instructions on how to use it and what each test means at the varying numerical levels. When a kit says reagent, this refers to the testing solution(s) (powder, liquids, tablets) used to test the water.

Some tests use colored tabs to show the level of pH, alkalinity, and other components you want to look at. You can go to this link to find out what some of the 2018 top kits are to look at. Links from the products take you to Amazon for review of each kit. Always note the rating for each kit you look at and read customer reviews, as they are the best indicator of how well the kit works.

Some of these kits may be expensive but weigh what the kit offers you in terms of how many results you can get out of it, along with ease of usage. A digital reading makes it easier than trying to match color-coded tabs, but you still may need to do chemical tablet testing too.

You can visit this link for YouTube videos that show how to use various pool water testing kits. Apparently, there is also an app that goes with one or two kits too. Technology expands exponentially, as always. With that in mind, let us look at what apps are available.

Related: Best Pool Heater

Using Smartphone Apps

Life could not get any easier! The smartphone app Insta-LINK Home will read test strips and tell you what you need to add to your pool water. You can get the app on Google Play.

Check first on Amazon to have a look at this product. Always check out reviews that will help you understand more about how the product works.

If you have a Zodiac iAquaLink system installed in your pool, then you may already know about the app that runs everything connected to your pool. That includes pumps, lights, and temperature. Yep, all of those things can be easily managed right from your phone. You can find this app on Google Play too.

I Have Cloudy Pool Water After Shocking

  1. Step one: Note how long the pump has been running. Check the pump system for damage.
  2. Step two: Check the filtration system to see if you need to clear out debris. Run the pump again.
  3. Step three: Do a water test to see if you need to add muriatic acid to raise it to the right pH level again. If so, wait until the water reaches the proper levels and do the shock again.

Safety is paramount when it comes to the well-being and health of your family members and those who visit you and swim in your pool. Never get into the pool until you have normal water readings and the pool is crystal clear. Now, enjoy your sparkling clean pool.

how to make homemade carpet cleaner

How To Make Homemade Carpet Cleaner | Best 4 Your Home

how to make homemade carpet cleaner

Wondering how to make homemade carpet cleaner—and how difficult it is to do so? I was wondering the same thing after reading the foreign sounding ingredients on the backside of a store-bought bottle. Now that I know how easy it is to make your own carpet cleaner, I’m never going back to anything else.

It’s a Good Idea to Make Your Own Carpet Cleaner

Most of us have a bottle of spray carpet cleaner stored with our other cleaning supplies. These products promise to get out a wide variety of stains on all types of carpet and upholstery. Isn’t this a lofty claim? How can one product get out every carpet stain? Isn’t there a difference between mud and ink? Would the same product get out blood and milk? What magical solution removes stains from wine AND grape juice? Ok- that may be a bad example.

Instead of using the same product on every different type of stain, you may consider using household products to create your own cleaner to target particular kinds of stain. You may find you are more able to remove the unwanted spot with these homemade concoctions.

Maybe you are happy with your store-bought carpet cleaner. For the type of traffic you receive on your carpet, your store-bought cleaner works well. But have you ever run out of carpet stain cleaner at an inconvenient time? What if the neighbor kid’s cherry Kool-Aid is spreading on your light colored rug, and you don’t have time to run to the store? You may need to rely on household cleaners to get the stain out before it sets.

Top Related Article: How to Use a Carpet Cleaner

Another reason to consider making your own carpet cleaner is that sometimes a solution you make will be less toxic and harmful to the residents of your house than some cleaners you purchase at the store. Take a moment to look at the ingredients and warnings on some of the detergents in your cabinet. Which products recommend that you wear gloves while using? Do you? Have you looked up what kind of effects some of those 13-syllable words can have on our health and our environment? Sometimes homemade recipes can be better for us than what we purchase at the store. Know what you are doing though. Mixing some solutions (even natural ones) can lead to a toxic or dangerous situation.

What follows first are general recipes for products you can make out of household products to use for general cleaning and freshening of carpets. After those recipes, read on to discover which household chemicals work on specific stains. Regardless, you will be happy to find out how to make your own carpet cleaner.

The Recipes: how to make homemade carpet cleanerhow to make your own carpet cleaner

There are a variety of recipes available for carpet cleaners. Many can be made with household products. Some are pastes or dry solutions while others are liquids. Some are treatments to freshen your carpet, while others attempt to get out stains.

How to make homemade carpet cleaner: Odor-fighting 

In a container, place two cups baking soda, ½ cup cornstarch, 1-tablespoon soap flakes or powder, 30 drops of lemon (or another citrus) essential oil, and 30 drops of tea tree essential oil. Stir the mixture until a damp powder forms. Let the mixture sit for several hours for the powder to soak up some of the wetness of the oils. Sprinkle the solution over your carpet, upholstery, or mattress. Let the powder sit on the surface for at least an hour before vacuuming. Enjoy a fresh-smelling room.

How to make homemade carpet cleaner: Carpet Cleaning Machines

Although most manufacturer instructions recommend purchasing and using their own liquid solution in their machines, some disregard those instructions. Many times the solution is expensive, and for those trying to watch every penny, making a homemade solution makes the most sense.

If you are trying to remove the every-day soil from your carpet, consider mixing equal parts white vinegar with warm water. Add the mixed solution to your carpet cleaning machines.

Does this simple solution not seem to cut it? Are your carpets still dingy? Try this solution:

Fill the water reservoir one-half full of warm water. Add one cup of rubbing alcohol and one capful of Lysol concentrate in with the water. Fill the rest of the container with white vinegar.

Another carpet cleaning solution includes ammonia in its list of ingredients. Add three teaspoons of clear dishwashing liquid, ¼ cup of ammonia, and ¼ cup of vinegar to two or three gallons of water. Be careful when cleaning with ammonia. Make sure you are using it in a well-ventilated area.

Related Article: Lightweight Vacuum Cleaners

Many homemade solutions include OxiClean. Consider trying this one. In a bucket, combine two tablespoons of liquid laundry detergent, ¼ of all-purpose liquid cleaner, one scoop of OxiClean, one teaspoon of fabric softener, and one gallon of hot water. Mix the solution and run this through your carpet cleaning machine.

Another ingredient people swear by is hydrogen peroxide. Consider making this recipe for your carpet cleaning machine. Merely pour ¾ cup of hydrogen peroxide in the receptacle. Add 1 ½ cups of water and five drops of lemon essential oil.

It should go without saying that it is essential to do a spot test before cleaning your entire carpet with any cleaner, homemade or store bought. This is especially true if you are using the previous recipe that lists hydrogen peroxide as an ingredient. To test, pick an inconspicuous area of the carpet. Consider a spot that will always be covered with a piece of furniture. Spray the cleaner on the section of the carpet. Wait 24 hours. After one day, check the spot for color changes or other damage. If you notice a color change, even a slight one, do not use the cleaner on the rest of your carpets.

How to make homemade carpet cleaner: Stain Fighting Powershow to make homemade carpet cleaners

No matter if you use a commercial carpet cleaner or a homemade recipe, it is important to remember the following techniques when trying to remove a stain from your carpet.

  • Blot the spill.
  • Work from the outside edge of the stain to the inside.
  • If the spill just happened, use a clean cloth or paper towels and push down on the liquid to soak it up.
  • After your liquid is absorbed in paper towels or cloth towels, spray your cleaner on the stain. Allow the cleaner to sit for fifteen minutes.
  • Begin the blotting process again.

Hopefully, this time as you blot, you will see more of the stain leaving the carpet.

What NOT to Do When You Spill on Carpet

Do not throw a fit. Life’s too short to sweat over a spot on the rug. Instead of crying, consider quoting Shakespeare, and say: “Out, damn spot!” It’s ok to cuss because you are quoting Shakespeare while you do it, and because of this, the cussing doesn’t count.

Next, remember NOT to rub the spot vigorously back and forth. This motion will spread the stain to a larger area. Aggressively rubbing the area can also cause the carpet fibers to break down, and besides a stain, you will now have a damaged circle of carpet. Rubbing the area will also cause the stain to infiltrate the carpet fibers more than if you had blotted them out in the first place.

So far, we have discussed general carpet cleaning tips and recipes for cleaners. But wouldn’t specific ingredients fight against stains better than others? Stain fighting uses chemistry, so instead of spraying any combination of ingredients on the spot on the carpet, why not pinpoint which would be best for your situation? Read on to discover some of the best practices to get out specific stains.

How to make homemade carpet cleaner: Remove Beer and Wine

Use either club soda or vinegar and water to get out stains from beer and wine. Instead of pouring club soda directly on the spot, pour some of the soda on a clean cloth. Use this cloth to blot the area stained with beer or wine, keeping in mind to work from the outside of the stain to the center.  If this doesn’t work, spray a mixture of white vinegar and water onto the area. Use a clean sponge or rag to soak up the liquid from the carpet.

Even after you think you have gotten all the liquid out of the carpet, get another clean, dry towel to place over the area. Press it down with something substantial, like a stack of phone books. (After you are finished with the phone books to get out the stain, consider recycling them. You really don’t need to keep phone books around anymore.)

Related: Best Canister Vacuums

Oddly enough, some sources say that red wine stains can be removed by pouring white wine on it. Obviously, these sources may not be accurate. All that wine in the house and access to the internet often can lead to inaccurate articles and other shenanigans.

How to make homemade carpet cleaner: Remove Blood

Hopefully, you never end up with blood stains on your carpet. If you do, it is a good idea to be prepared. First, loosen up the dried blood with a carpet cleaning detergent. Blot the cleaning solution from the area. Next add hydrogen peroxide directly to the stain. Dab the hydrogen peroxide with a clean cloth to remove the liquid and hopefully the blood with it.

Lemon juice can also be used for those pesky and prevalent blood stains. The natural acidity in lemon juice works as a bleaching agent. The added benefit of using lemon juice is that it will leave your house smelling fresh and clean, but having a fresh smelling home is the least of your problems if you have blood on your carpet.

How to make homemade carpet cleaner: Remove Grease

Another tricky substance to remove from carpet is grease. To help remove grease stains, use dishwashing soap that is marketed to cut through grease, such as Dawn.  Spray a water/detergent solution to the area and dab up the excess with a clean, dry cloth. You may need to repeat this process several times to get the grease out of your carpet.

How to make homemade carpet cleaner: Remove Gum

Gum can be tricky to remove from any soft surface. If you find yourself with gum on your carpet or upholstery, head to the freezer for an ice cube. Apply the ice directly to the gum and wait for it to freeze. Once the gum is frozen, it should be easier to remove the sticky substance from the carpet fibers.

How to make homemade carpet cleaner: Remove Candle Wax

Candle wax on your carpet or any other soft surface should be no cause for alarm. Place a clean, light-colored towel over the wax and press the area with a heated iron. The heat from the iron will melt the wax and allow you to scrape it off the carpet fibers using a butter knife. Do not place the iron directly on the carpet. You could melt your polyester carpet, and then you will wish that you just would have left the wax on your carpet in the first place.

Related: Best Commercial Vacuum Cleaner

How to make homemade carpet cleaner: Remove Coffee or Teahow to make your own carpet cleaners

Some say pouring beer directly over a coffee or tea spill will remove the stain. This seems like a waste of beer to me.

How to make homemade carpet cleaner: Remove Ink

Other sources say applying a paste made of milk and cornstarch to an inky area can clear up stains. Apparently, cornstarch can also be used on oil stains as well.

Many of my childhood memories involve my Grandma carrying around a can of WD-40, but I don’t remember her using it to clean her carpets. Apparently, ink stains can be removed with this miracle substance.

How to make homemade carpet cleaner: Remove Vomit

At the risk of being gross, the best cleaner to use is entirely dependent on the last meal the person who vomited ate. Sorry for going there. Since most of us don’t have access to the pink powder grade school custodians use to clean up vomit, we have to rely on baking soda. First, wipe up most of the vomit with paper towels, and then sprinkle baking soda over the affected area. Dab the area with a paper towel and then vacuum.

Related: Best Robot Vacuum

How to make homemade carpet cleaner: Remove Rust

Placing a paste made with baking soda and water over rust stains can help leave your carpet as clean as can be.

How to make homemade carpet cleaner: Water-soluble Stains

Water-soluble stains, such as stains involving mud, some beverages, or food that melts can be removed with a solution made of water and white vinegar.

Is there anything more satisfying than removing a stubborn stain? Does it make you feel like Wonder Woman or Super Man? No? Well, me either. That would be ridiculous.

how to use a carpet cleaner

How To Use A Carpet Cleaner Machine | Best 4 Your Home

how to use a carpet cleaner

Hardly anyone enjoys learning how to use a carpet cleaner machine, but most enjoy the results after it is done. This could describe a lot of scenarios. Exercising. Painting a room. Cleaning the shower. Birthing a baby. And cleaning your carpet. This article will tell you how to use a carpet cleaner, as well as how a carpet cleaner works. Learn the steps involved in the process. Discover tips to make carpet cleaning as easy and as effective as possible. And answer the question everyone wants to know: how does a carpet cleaner work?

The Carpet Cleaning Process Step-by-Step 

  1. Remove all the furniture from the room you wish to clean.

Granted, this is a lot of work, especially if your rooms are like my mother-in-law’s and chock full of heavy furniture covered with porcelain cats. How about this: remove most of the furniture from the room you wish to clean.

  1. Wipe down all the surfaces

Wipe down the furniture, as well as the walls, vent covers, and ceiling fan blades.

  1. Vacuum the carpet thoroughly.

Use the edger piece of your vacuum and make sure to vacuum the corners and trim thoroughly. Take off the vent covers and vacuum as much debris as you can out of the ductwork. While carpet machines have some suction, they are not the same as a vacuum. Do not skip this step.

Top Related Article: Lightweight Vacuum Cleaners

  1. Look for stains on the carpet that need pre-treating as you vacuum.

Mark the stains with whatever you have handy – pieces of paper, shoes, or post-it notes.

  1. Pre-treat any stains you find with carpet stain cleaner.

For some instances, it is recommended that you use the carpet machine to work the stain remover into the carpet. Others recommend you use a clean cloth to blot up the stain. This usually depends on what type of stain removal product you purchased. Read the label and follow the directions. Keep reading to find tips on how to treat specific types of stains later in this article.

  1. Learn how your carpet cleaner works.

Read the directions. Look for online tutorial videos. Look at the machine’s settings. Make sure you understand how to use the rug cleaner. Some machines require you to pull it backwards across the room, while the forward action sucks up the water. Some carpet cleaners work while moving forward. Make sure you know how to use your model, or else you will go through a lot of work with minimal reward. How unsatisfying would that be?

  1. Learn about the surface you are cleaning.

Rug shampooers use heat to activate the soap within the machine. Using warm or hot water on rugs with natural fibers may cause the rug to shrink. Most household carpets can withstand the heat, but some rugs may be made of wool and would be destroyed by the carpet-cleaning process.

  1. Start in the corner of the room furthest from the doorway.

Keep in mind that the carpet will be damp as you shampoo it. Any debris at the bottom of your shoes may “wash off” on your damp carpet, so it is advisable to either wear immaculate shoes while carpet cleaning or wear no shoes at all.

  1. Move slowly from the starting corner to the wall on the other side of the room. As you turn around, overlap your first swath to make sure that each section of your room receives at least two treatments.

  1. Move slowly and methodically throughout the room.

Most carpet cleaners spray soapy water into the carpet and then suck up the now dirty water back into the machine. If you move too quickly, the machine will not have the appropriate amount of time to suck up the dirty water. Consider walking one step per second or slower.

  1. Listen to your machine as you use it.

Some machines have no indicators alerting the user when more soap or water needs to be added. Your machine may be the same way. Pay attention to the water level and any change to the sound of the machine that might indicate a change needs to be made.

Related: Best Canister Vacuums

  1. Empty the dirty water into the toilet or outside.

Keep in mind, some machines may pick up carpet fragments or other solid debris. Dumping this debris down the sink or tub may cause the pipes to clog.

  1. Look at the dirty water you are dumping.

You can now choose to stop and congratulate yourself on a job well done, or if your water seemed especially dirty, you might decide to repeat the process.

  1. Repeat at a 90-degree angle

If you chose to repeat the process, consider running the carpet cleaner at a 90-degree angle from where you ran it the first time.

  1. Run the shampooer again

If you are satisfied with the color of the water you are dumping, run the shampooer a final time. If during the second run the wastewater is still extremely muddy looking, you may consider running the shampooer the third time.

  1. Run the machine a final time.

Once you are satisfied with the carpet’s cleanness, run the machine a final time with cold water and no soap. Using hot water will cause the soap in the carpet to produce suds again. Cold water will work to rinse the carpet.

  1. Wait for your carpet to dry.

Consider running ceiling fans and the air conditioner to promote drying conditions. Your home’s air conditioner works to pull moisture out of the air, so it is an effective tool in drying your carpets as quickly as possible.

  1. Stay off damp carpets

Don’t go back onto carpets until they are completely dry. Keep pets and children out of the area. Drying may take overnight. Put fans on and open windows to help it dry faster and prevent mold.

  1. Move furniture back into the room.

Keep in mind that the carpets may seem dry to the touch but may have some dampness in the deep fibers. If your furniture has any metal on the bottom of the legs, place the legs on coasters. If you place metal on wet surfaces, you may discover rust-rings in your carpet the next time you move the furniture.

Related: Best Commercial Vacuum Cleaner

  1. Rinse out the tanks on your machine.

Allow them to dry completely before putting the lids back on the tanks.how to use a carpet cleaner

how does a carpet cleaner work

How Does Your Carpet Cleaner Work?

There are a wide variety of carpet cleaners or carpet shampooers on the market. One can purchase a unit to use at home or rent one through grocery stores or home improvement stores. Even though the technology behind carpet cleaners vary from brand to brand, most work in a similar fashion.

The operator fills up the unit with water and soap. The sizes of the tanks vary greatly and depend on the size of the machine being used.

Some cleaners recommend using only their solvents on their machines. Since carpet cleaners are relatively expensive, it would behoove the user to follow these instructions.

Some units heat the water in the tank. If your machine has that capability, let the water heat before beginning the operation. Some units have the ability of heating water to 210 degrees Fahrenheit within three minutes.

Regardless if the water is heated or not, the water combines with the soap and is injected onto the surface of the carpet. A pump generates the pressure to spray the water. The pump pressure on carpet cleaners is usually about 60 pounds per square inch. Although, it can go as high as 500 pounds per square inch.

Once the soapy water is sprayed over the surface of the carpet, a vacuum sucks up the water into an extraction tank. This vacuum can be measured by its airflow, or how many cubic feet of air per minute it moves through the machine, as well as how many inches of water the vacuum suctions out of the carpet. The typical airflow for carpet shampooers is 100 to 200 cubic feet per minute. The water lift usually ranges from 100 to more than 250 inches.

The dirty water is sucked into a recovery tank. The size of this tank varies significantly between the models of the machines.

Some carpet cleaning machines do not work this way. Steam carpet cleaners are also available for purchase or rent. These units use dry vapor steam to clean the carpets. This is not as common as the previously described models.

Related: Best Vacuum for Pet Hair

Keep in mind, carpet cleaners are not just for carpet. Most carpet shampooers come with a variety of attachments that can be used for other areas of your home besides your carpet. Some attachments allow users to clean upholstery and curtains.

How to Get Stains Out of Your Carpet 

Stains happen, unless you are a famous singer that only allows clear drinks in her house. Most of us do not operate on that level of OCD, so most of us have to deal with stains on our carpet at some time during our lives. Here is a general guide to help you remove these imperfections from our floors.

Blot. Don’t rub.

If the spill just happened, use a clean cloth or paper towels and push down on the liquid to soak it up. Aggressively rubbing the area can cause the carpet fibers to break down prematurely. Rubbing can also cause the particles to get ground into the threads. While blotting, remember to start from the outside edge of the stain and work inward. Blotting from the inside of the stain outward can spread the stain.

Use club soda or vinegar and water to get out stains from beer and wine.

Dampen a clean cloth with club soda. Use this cloth to blot the area stained with beer or wine. If this doesn’t work, spray a mixture of white vinegar and water onto the area. Use a clean sponge or rag to soak up the liquid from the carpet. Press a clean towel to the area and apply continuous pressure with something substantial.

Say hello to shaving cream, yes, shaving cream.

While spot carpet cleaner is usually your best bet to remove stains, a desperate situation calls for extraordinary measures. Consider trying ordinary shaving cream to get out general stains from your carpet. Apply the shaving cream to the stain and let it sit for about 30 minutes. Blot the shaving cream away with a clean cloth.

How to Use a Carpet Cleaner to Remove Specific Stains

While you now have a general idea on how to get out stains, it is now time to become more specific and find out how to treat particular stains. Before using your carpet cleaning machine, take the time to use the following tricks to remove the bulk of the following stains…

Remove Blood from Carpets

While we don’t want to know how you ended up with a blood stain on your carpet, we will tell you how to get rid of one. First, loosen up the dried blood with a carpet cleaning detergent. Blot the cleaning solution from the area. Next add hydrogen peroxide directly to the stain. Dab the hydrogen peroxide with a clean cloth to remove the liquid and hopefully the blood with it.

Remove Grease from Carpets

Another tricky substance to remove from carpet is grease. To help remove grease stains, use dishwashing soap that is marketed to cut through grease. Spray a water/detergent solution to the area and dab up the excess with a clean, dry cloth. You may need to repeat this process several times before going back over the area with your carpet cleaning machine.

Remove Gum from Carpets

Gum can be tricky to remove from any soft surface. If you find yourself with gum on your carpet or upholstery, head to the freezer to get an ice cube. Apply the ice directly to the gum and wait for it to freeze. Once the gum is frozen, it should be easier to remove from the surrounding fibers.

Remove Candle Wax from Carpets

Candle wax on your carpet or any other soft surface should be no cause for alarm. Place a clean, light-colored towel over the wax and press the area with a heated iron. The heat from the iron will melt the wax and allow you to scrape the wax off the carpet fibers using a butter knife.

More Tips to Score Cleaner Carpetshow does my carpet cleaner work

It sometimes feels that 25 percent of the internet is full of household products that can be used a variety of ways. While it is easy to be dubious about how some household substances can be used to clean your carpet, desperate times call for desperate measures.

Some say pouring beer directly over a coffee or tea spill will remove the stain. This seems like a waste of beer to me.

Other sources say applying a paste made of milk and cornstarch to the area can clear up ink stains. Apparently, cornstarch can also be used on oil stains as well.

Is your carpet seemingly ruined because your tipsy sister-in-law spilled red wine in the center of your living room? Don’t worry. According to do-it-yourselfers, you can pour white wine on the red wine spill to dilute the color in the rug. After you clean the spot with cold water, sprinkle the area with salt and wait ten minutes. Or you could just drink more wine, and then the stain will cease to be as big of a deal as it once was.

Many of my childhood memories involve my Grandma carrying around a can of WD-40, but I don’t remember her using it to clean her carpets. Although, come to find out, many people use this miracle substance to remove ink stains from carpets.

Related: Best Robot Vacuum

Since most of us don’t have the pink powder grade school custodians use to clean up vomit, we have to rely on baking soda. First, wipe up what you can with paper towels and then sprinkle baking soda over the affected area. Dab the area with a paper towel and then vacuum.

Natural Ways to Remove Stains 

Some say to forget store-bought carpet cleansers. Instead, any stain can be treated with either lemon juice, baking soda, white vinegar, and a household detergent—or a combination of the four.

Placing a paste made with baking soda and water over rust stains can help leave your carpet as clean as can be.

Water soluble stains, such as stains involving mud, beverages, or food that melts can be removed with a solution made of water and white vinegar.

Lemon juice can be used for those pesky and prevalent blood stains. The natural acidity in lemon juice works as a bleaching agent. The added benefit of using lemon juice is that it will leave your house smelling fresh and clean.

As with any cleaner, make sure you test the product in a corner of the room that does not see very much traffic before applying it to the carpet in the middle of your room.

Regardless if you prefer store-bought products or home remedies, pre-treating stains is a necessary part of the carpet cleaning process. Also, remember to remove soil and debris by vacuuming thoroughly before starting up the carpet cleaner. Run the carpet cleaner until the water runs as close to clean as you are comfortable with. Then, make sure to allow the carpets to dry completely before reloading the room. Run the air conditioner in the house to help the moisture in your carpet dissipate rapidly.

Having clean, fresh carpets is entirely satisfying. Take care to follow the process described. It is quite a bit of work, but completely worth it in the end.

how much to tip carpet cleaners

How Much To Tip Carpet Cleaners?

how much to tip carpet cleaners

How much to tip your carpet cleaner sounds like a simple question, but it’ll get a variety of responses—from $0 to $100+. Tipping is a common custom and courtesy in the United States, however, the expectations for tipping vary throughout other countries in the world. The expectation and standards for tipping vary for different services and industries as well. Most people have memorized the tipping standards for services such as dining service, food delivery, and bartending, but have you ever wondered how much to tip carpet cleaners?

See Also: Best Lightweight Vacuum

Carpet cleaning is a very physically demanding and time-consuming job. In fact, carpet cleaners work some of the longest hours out of anyone in the service industry. Although carpet cleaners work hard, they, unlike those in other service industry positions, do not depend on tips to make up their salaries. This makes knowing whether or not to tip your carpet cleaners, and how much, a common question among those using the service for the first time. Let’s take a look at the carpet cleaning industry and learn more about the common practices for tipping carpet cleaning professionals.

How Much to Tip Carpet Cleaners Depends on Overall Cost of Carpet Cleaning

For many people, the cost of carpet cleaning is important to know when trying to figure out how much to tip carpet cleaners. If you are considering having the carpet in your home or office professionally cleaned, you may arrive at this question when trying to budget for the overall expected costs. The national average cost of carpet cleaning is $176. This figure can vary based on your location, the size of the area to be cleaned, and the existence of any hard to treat stains on the surface of your carpet. Also, this can vary based on the type of carpet cleaning treatment that you select.

Carpet cleaners have two ways of charging for their services. They may charge a per room rate or a rate based on square footage. With a per room rate, you are charged a flat rate for each room cleaned regardless of its square footage. This is beneficial for those who are using this service for a home or office space with many rooms of varying sizes. One of the downsides of this type of rate is that there may not be a discount for exceptionally small rooms. Although, there might be an increase in the rate for exceptionally large rooms.

Related: Central Home Vacuum System

Other carpet cleaning services charge by the square foot. This form of payment is more exact, but it has its downsides as well. Being charged by square footage means that your carpet cleaning service will take longer to complete. This is because your carpet cleaner will need to take measurements of your space in order to prepare an estimate. This may require your carpet cleaner to take multiple trips to your home or office space in order to complete the job. The good news is that if you plan to have your carpet cleaned regularly, then they will not have to measure the space repeatedly (assuming that you choose to have your carpet cleaned by the same company).

how much should I tip carpet cleaners

Other Carpet Cleaning Cost Factors

Aside from the method of charging for a carpet cleaning service, there are other factors that affect the overall cost. These factors include stain removal, which can sometimes carry extra charges, and the cleaning method that your carpet cleaner uses. These factors are also important to consider when deciding on a tip for your carpet cleaner. The extra effort required to remove a tough stain may inspire you to offer a tip to your carpet cleaner.

Stains

One of the biggest factors that can increase the cost of cleaning your carpet is a tough stain. If you have spilled difficult to clean beverages such as coffee or fruit juice onto your carpet, then you can expect to pay a higher rate to have it removed. A hard to remove stain may also warrant a higher tip due to the extra effort that will be required of your carpet cleaner. It is best to ask your carpet cleaner about any extra charges for stain removal when you receive your estimate for the service. This can help you to avoid the shock of extra charges.

Cleaning Method

Carpet cleaners can use cleaning chemicals and dry cleaning or steam cleaning to make your carpet clean, soft, and beautiful. The overall cost of carpet cleaning may vary based on the methods that are used. It can also vary based on the size and brand recognition of the carpet cleaning company.

Related: Best Canister Vacuums

Steam cleaning is the most popular method of carpet cleaning. This method of carpet cleaning is performed by an electric or vehicle-mounted cleaner. Steam cleaning utilizes a scientific method called hot water extraction. This involves using high pressure to deposit cleaning chemicals and hot water into the carpet. This process effectively loosens debris, dirt, and light stains making them easy to extract from the fibers of your carpet using suction. Steam cleaning is a must for anyone who wants to maintain the warranty on their carpet.

Related: Best Commercial Vacuum Cleaner

Dry carpet cleaning, or low moisture carpet cleaning, involves using cleaning chemicals and a limited amount of water to clean carpet quickly and easily. It is best for carpet that does not have major stains or a lot of dirt and debris because it doesn’t loosen dirt as completely as steam cleaning. Dry carpet cleaning uses a sprayer, rotary machine, and/or a brush to loosen and vacuum dirt and debris. It greatly improves your carpet’s appearance and keeps the carpet looking nice for a longer time period than steam cleaning. Dry cleaning is a great option for regular maintenance.

how much to tip my carpet cleaners

How much do carpet cleaners make?

A reason for tipping people in certain positions, specifically restaurant service, is to make up for low hourly wages. In other industries, tipping is simply a common courtesy for a job well done. Due to this standard of tipping, many people who are using carpet cleaning services are curious about the hourly wages of carpet cleaners.

Related: Best Vacuum for Pet Hair

On average, most carpet cleaners make $11 – $18 per hour. Because of the relatively high wages that carpet cleaners earn in comparison to other service jobs, they are not necessarily dependent on tips for their livelihood. The best carpet cleaning companies pay a fair hourly wage, and some even offer commissions of 10% or more to their carpet cleaners. This allows carpet cleaners to provide above and beyond service without the expectation of a tip.

Should I Tip My Carpet Cleaner?

Although tipping is not required or expected for carpet cleaning service providers, it can be a nice gesture for a carpet cleaning professional who works hard and provides excellent customer service. A carpet cleaner will not automatically expect a tip. Although, it is a great gesture of appreciation for carpet cleaners who provide excellent customer service.

Tipping is not an ordinary or expected standard when it comes to professionals who come to perform work in your home. However, it is always best to show appreciation to hardworking individuals by being courteous and welcoming them as a guest. It is never a bad idea to offer a home or office service professional a cold drink or a cup of coffee as they provide their services.

Most carpet cleaners do not expect to earn a monetary tip, so choosing to offer one is entirely up to you. Carpet cleaners are not dependent on tips to cover their salary, and they understand that most people do not think to offer one.

How Much to Tip Your Carpet Cleaner?

Most carpet cleaners do not expect tips. But, if you choose to tip your carpet cleaner, then how much is entirely up to you and is based upon the quality of the job and your available budget. A good tipping rate for exceptional carpet cleaning services is 20%. Carpet cleaners that do receive tips do not have a specific expectation for the amount and it varies greatly on a per customer basis. In most cases, the tip received depends entirely on how much cash the customer happens to have on hand.

Related: Best Robot Vacuum

If you plan to use carpet cleaning services regularly, then tipping is a great way to establish a relationship with your carpet cleaner. A carpet cleaner who knows that they are appreciated for their services may even go the extra mile when cleaning your carpet in the future. However, there are many ways to show your appreciation for great carpet cleaning service other than money.

If you decide to offer a tip to your carpet cleaner or any other home or office service professional such as a housekeeper, janitor, electrician, or plumber, then be sure to offer it graciously. It is never a good idea to shove extra bills at them in a way that may come across as rude or pretentious. Many home service professionals appreciate tips being given in the form of offering cash to cover their lunch to show gratitude for a job well done. They also appreciate words of gratitude, great reviews for their services and their company, and referrals to more customers who could use their services.

How to choose a sewing machine that will suit your needs

How to Choose a Sewing Machine

How to choose a sewing machine properlyToday’s sewing machines are not “grandmother’s” huge devices with a mechanical drive. Today’s sewers increasingly prefer new devices with a variety of functions.

What are the types of modern sewing machines? And how to choose a sewing machine that will suit your needs?

How to choose a sewing machine and not make a mistake

When choosing a sewing machine, look at the following parameters:

  • Control type
  • Type of shuttle
  • Performed stitches
  • Paws
  • Type of looping
  • Sewing speed
  • Engine power

Control type

Modern sewing machines are electrically powered and have electromechanical or electronic control. Sewing machines of the first type are the most popular because they are easy to use. For example, a type of the stitch in them is selected using a special wheel on the front panel.
Electronic (computer) control provides more opportunities for sewing. Such devices provide more functions and seams than electromechanical ones. They also often come with a “sewing assistant”, which prompts which settings to choose for a specific task.

Shuttle type

Sewing machines also differ in the type of shuttle. Shuttles can be vertical swinging, vertical rotational and horizontal.

A vertical pendulum shuttle was developed first. It swings left and right at sewing. This type of shuttle is common in inexpensive models. A vertical swinging shuttle must be regularly lubricated.

The vertical rotary shuttle is most often used in expensive sewing machines. As the name implies, it is located vertically, but rotates along the horizontal axis instead of swinging. This type of shuttle is often provided on professional equipment, so we recommend considering it if you are looking for devices for an atelier.

A horizontal shuttle is located along the sewing plane. It is considered to be the most modern and works much faster and quieter than vertical ones. There is no need to lubricate the horizontal shuttle, just simply clean it.

Operational or decorative?

Stitches can be simple and decorative. The best option for repair and making of clothing is straight stitching and zigzagging, for processing the clothing edges – an overlock imitation.

The number of stitch types in electromechanical sewing machines can be from 6 to 40, in computerized machines – a couple of hundred. Coverstitch machines can offer as much as 500 types of stitches. Practice shows that not all types of stitches are used at sewing. Therefore, even if decorative stitches look nice, think if you really need them before buying a sewing machine.

Looking at the paws

Different sewing operations require the corresponding paws. Before making a purchase, look if a sewing machine has them – universal, loop ones, for sewing zippers and for a secret stitch. Some manufacturers may add extra paws for special tasks: ruffling, adding braids, ribbons or beads, quilting, paws for fringe or patchwork. In any case, you can always purchase the required paws additionally.

Types of looping

Processing loops in modern sewing machines can be semi-automatic and automatic. Of course, automatic processing is more convenient, because it allows quickly make a series of neat loops without switching. But this option is presented in expensive models.

Sewing machines from the middle price segment have a function of semi-automatic processing. In this case, looping is performed in four operations: fastening from the top – processing one side – fastening from the bottom – processing the second side.

So, if you sew clothes with buttons not very often, consider sewing machines with the semi-automatic mode.

Sewing speed

The sewing speed of a sewing machine is adjusted by the pressing the pedal. Adjustment can be either stepped or smooth, with the function of protection against jerking. There are also sewing machines without pedals. In such devices, switching on and stopping is performed by pressing the start/stop button. 

Engine power

Engine power of sewing machines is not the most important parameter. But we should note that most models have an engine power of 50 to 110 watts. The engine power determines the force of piercing a fabric with a needle and the thickness of the fabric that you can work with accordingly. A sewing machine can also include sets of needles, paws and bobbins, rippers, coil holders, hard protective covers and much more for its successful operation and service.

Embroidery machines

Embroidery machines with computer control stand alone in the family of sewing machines. These devices are designed for professional use and can perform more than 500 types of operations. They can satin-stitch and cross-stitch, do Richelieu embroidery and festoons, reproduce embroidery according to a given project and download schemes from the Internet. There are only buttons for quick access on the case, all information regarding the device operation, including manuals, is displayed on the touchscreen.

Any specialist in the sewing business will say that an overlock is an essential addition to the purchase of a sewing machine and they will be right. Usual sewing machines do the shuttle type of the stitch, while overlocks use chain stitch, so the edge of the fabric is cut off and processed better. Modern overlocks can do from four to seventeen types of stitches, have a differential supply of the fabric, making it easier to work with elastic and light materials.

A coverstitch machine is usually required for professional seamstresses working with knitwear. It creates an elastic flat seam for high quality processing the edges of the product.

A coverlock is a symbiosis of an overlock and a coverstitch machine combining functions and capabilities of both. A coverlock allows making stitches of high quality, several dozen overlocking seams and has a large working surface.

If you need a sewing machine for an atelier or you are a sewing business professional, consider professional models. This is exactly what sewing machines with computer control are.

But if you are looking for a sewing machine for personal household needs, or you just want to learn how to sew, a general-purpose electromechanical sewing machine with standard types of stitches will do.

[su_frame align=”left” class=”relatedposts”]

Read also:

[/su_frame]

Best way to clean a carpet

How to Clean a Carpet: 3 Types of Cleaning That You Can Apply

How to clean a carpet

In this article, we are going to tell you how to clean a carpet in three ways. Thus, your carpets can look like new for a long time.

How to clean a carpet with vacuum cleaners

Today, cleaning a carpet is easy thanks to modern vacuum cleaners, such as washing, steam vacuums or vacuum cleaners with water filters. We will give you a few recommendations on how to use them if you decided on this type of cleaning.

[su_note note_color=”#e6f1f7″ text_color=”#333333″ radius=”0″ class=””]

  • Clean a carpet from both sides – front and reverse sides, starting from the reverse, otherwise, the dust will get absorbed there.
  • Brush along the pile forward and back, never brush across the pile. Vacuum in rows, from the edge to the edge. After vacuuming one row, go to the next one, without pressing the brush too much not to damage the pile.
  • Select proper nozzles. If you have a natural carpet, use a brush with a long bristle. For rugs, use a short bristle, for carpets with long pile – a smooth nozzle without bristles.
  • If a woolen or semi-woolen carpet was purchased recently, you can just sweep it with a soft broom in the first six months.
  • For cleaning woolen rugs, use liquid soap foam.
  • Before processing a synthetic rug, first spray it with an antistatic agent, as the pile gets electrified and the dust will be difficult to remove.

[/su_note]

[su_divider top=”no” style=”dotted”]

Recommended for you: Carpet cleaner reviews

[su_divider top=”no” style=”dotted”]

Wet cleaning – one of the best ways to clean carpet

Wet cleaning is either a full washing a carpet or cleaning its surface with water.

It is better not to wash natural carpets, as you can damage the pile. A convenient option for home is deep foam cleaning. In this case, a carpet does not get wet completely and the foam perfectly removes the dirt.

You can buy special shampoos for that or make foam by yourself – just dilute the detergent with water. Vacuum a dry carpet first, then apply the foam and vacuum again. You must vacuum almost immediately because if the foam stays for a long time, a carpet will get soaked, that can damage it.

Do not do wet cleaning too often, as chemicals in the detergents will gradually corrode the fibers.

A woolen surface can be also cleaned with a rag moistened with a solution of ammonia or liquid soap.

There is usually no problem with wet cleaning in winter as it is commonly known how to clean carpets with snow. Just spread a carpet outside, sprinkle it with fresh snow and then sweep it in all directions with a broom or a brush, periodically replacing the dirty snow with clean one.

It is better to clean a carpet on a fine day when you can open the windows for a carpet to dry out completely (but not under direct sun rays).

Cleaning with absorbents

An absorbent can be what that you can find in the kitchen – table salt (an absorbent is a substance that can absorb a large amount of any other substance). Just scatter dry salt on the carpet, then weep it with a broom washed in soapy water. Repeat this several times, adding new salt as the previous one gets dirty. Then, just vacuum the remaining salt after cleaning.

[su_frame align=”left” class=”relatedposts”]

Read also:

[/su_frame]